
Unity Vivox (UGS版) でボイスチャット・テキストチャットを行う【Unity Gaming Services】
Unity Vivox
Vivox は統合型チャット(テキスト・ボイス)クラウドサービスです. Fortnite,VALORANT,LoL,PUBG などでも利用されています.
以前から Unity に買収されているサービスで,結構ボイス・テキストチャットのサービスとしては 個人的に開発者としてもとても使い勝手が良いです.(何故か日本国内ではあんまり見かけないイメージがありますが…)
今回 Unity Gaming Services の一つのサービスとして発表されました.
価格
CCU 5000 人までなら Vivox は無料に利用できます. これを超えることは滅多にないのでぜひ使いたいところですね.
5001 人以上からの値段は以下の通りになります.

対応プラットフォーム
- Xbox
- PlayStation
- PC
- Switch
- Android
- iOS
- Stadia
Unity Gaming Services (UGS) 版の Vivox と Unity SDK 版の Vivox の相違点
以降,UGS 版以前から存在している Vivox のことを SDK Vivox, UGS 版の Vivox を UGS Vivox と呼ばせていただきます.
審査の有無
SDK Vivox の場合,SDK をダウンロードするために 「Vivox」 のダッシュボードにログインする必要があります. 加えてアカウント・組織の登録が必要で,組織の審査を待つ必要があります.

UGS Vivox の場合,「Unity Gaming Services」側のダッシュボードでログインする必要があります. この時,改めてアカウント・組織の登録が不要で,審査を待つ必要もありません. とはいえ,Vivox のドキュメントは「Vivox」のダッシュボード上にあるので, いずれにせよ,アカウント・組織の登録は必要になります….
無料枠のエンドポイントが異なる
地味に違うのが Vivox Server の API エンドポイントが異なる感じですね.
無料枠の範囲で把握しているのは,SDK 版の方は mt1s,UGS 版の方は mtu1xp です.
これは固定みたいです.
Credential 設定
SDK 版の方は Unity Editor 側で ScriptableObject で Credential (APIキーなど) の 設定するしかありませんが, UGS 版の方は Unity Dashboard で設定されている Credential を自動的に読み込むことが出来るため, 改めて ScriptableObject で設定する必要があります.勿論カスタム設定を行うことも可能です(後述).
Unity Authentication 必須
SDK 版の方は認証処理は特にありませんが, UGS 版の方は Unity Gaming Services の傘下ということもあり,Unity Authentication でサインインが必要になります.
サンプルプロジェクト
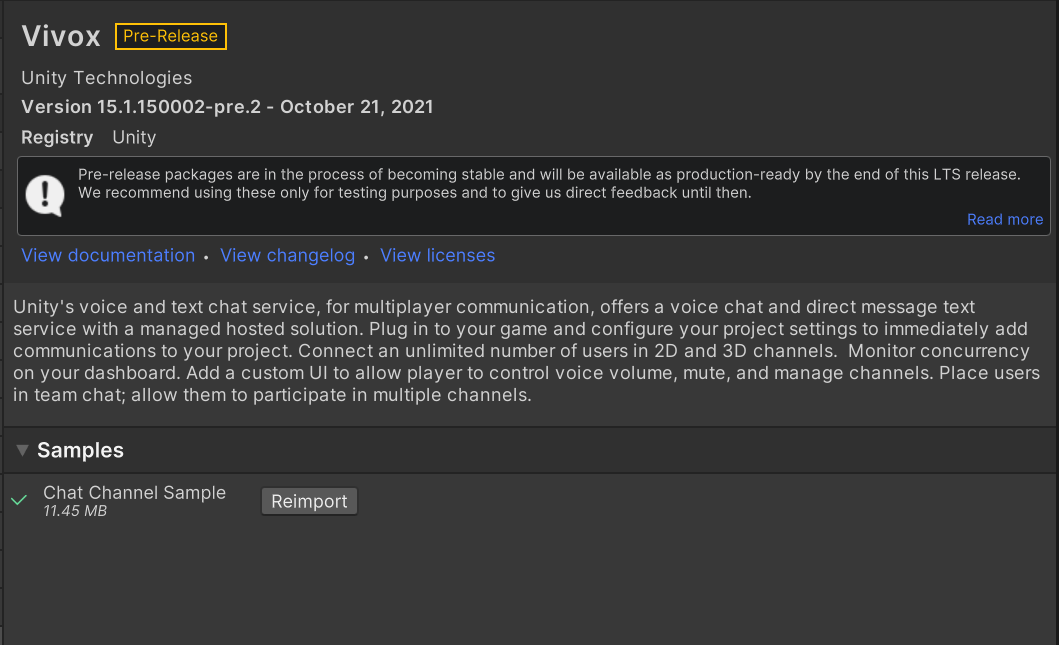
今回は Unity Package 側で提供されている Vivox のサンプルを利用させていただきます. Unity Package でインストール後,Samples > Chat Channel Sample があるのでそれを Import します.
検証環境
- Unity 2021.2.3f1
- Vivox 15.1.150002-pre.2
- Unity Authentication 1.0.0-pre.6
動作の様子
テキストチャット,Text to Speech,ボイスチャットを行っています. 同じ端末で動作確認しているため,ハウリングしています. 喋っているかどうかの判定をマイクUI側で表示させているの GOOD ですね. またローカルミュートも可能のようです.
解説
フロー
Vivox のフローとしては以下が基本になります.
① 認証処理 (Authenticate)
Unity Gaming Services を利用する上で認証処理は必要になります.
② 初期化処理 (Initialize)
Credential 設定に基づいた Vivox クライアントの設定・初期化を行い,JWT の作成を行います.
③ セッション接続処理 (Connect)
初期化処理の際に作成した JWT を基に Vivox Server とのセッション接続を行います.
④ チャネル入室処理 (Join)
指定されたチャネルIDに入室します.チャネルに入室してようやくチャット機能が利用できるようになります.
⑤ チャネル退室処理 (Leave)
チャネルを退室することで,そのチャネルからチャット機能が利用できなくなります.
⑥ セッション切断処理 (Disconnect)
Vivox Server とのセッション切断を行います.
事前準備・インストール
Unity Gaming Services の Dashboard 側を開きます.
Multiplayer > Vivox > (Vivox を利用したいプロジェクトを選択した上で) Get Started を選択します.
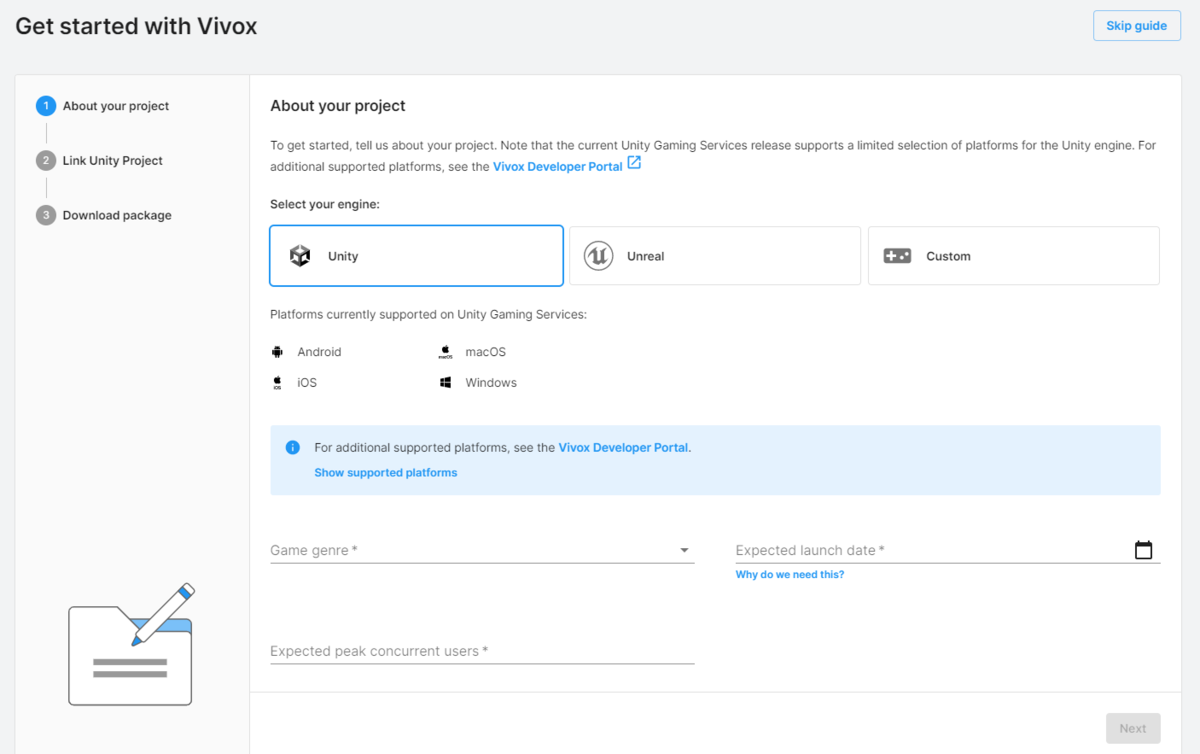
ここでは以下のような設定をしています.各自編集してください.編集が完了した後は「Next」を押下します.
- Select your Engine : Unity
- Game Genre : Party
- Expected Launch Date: Mar 31 2022
- Expected Peak Concurrent Users : 100

Link Unity Project 画面に進みます.画面にある通り,Unity Editor 側で Services General Settings の設定を行います. 完了した後は「Next」を押下します.

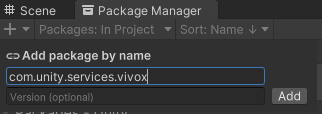
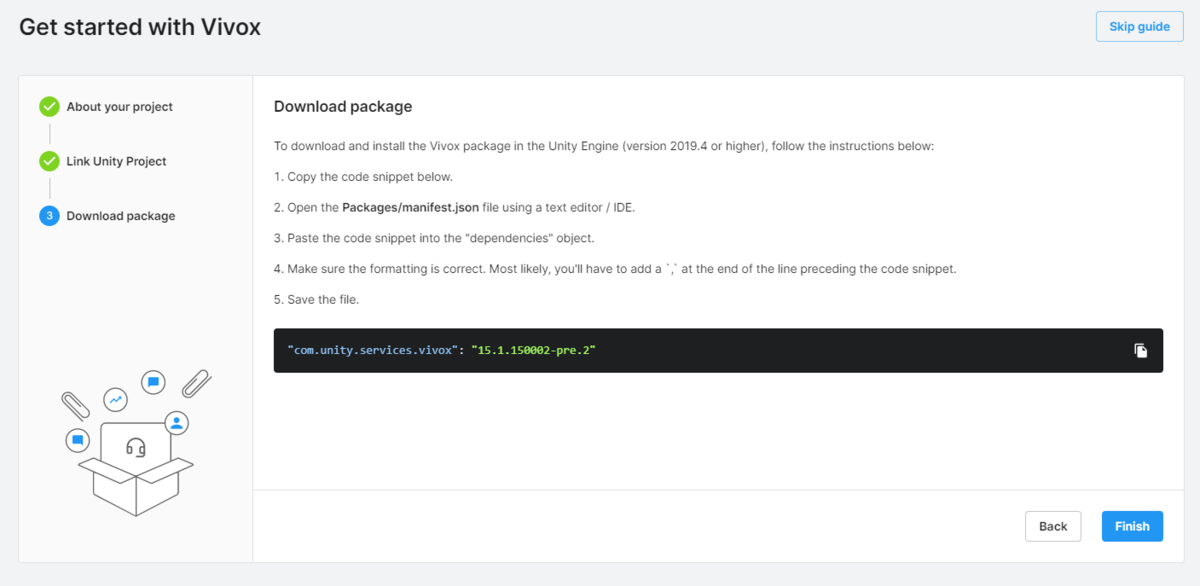
パッケージのインストールを行います.
Add Package by Name に com.unity.services.vivox を追加することで完了します.
あるいは Download Package 画面にある通り,manifest.json に以下を追加すればできます.
"dependencies": {
    "com.unity.services.vivox": "15.1.150002-pre.2"
 }
「Finish」ボタンを押下すれば 設定完了です.
この時 Vivox > Credentials の項目が出てくると思いますので, そこで Server / Domain / Token Issuer / Token Key の情報があれば大丈夫です.

UGS Vivox 無料版の場合は Domain は共通して mtu1xp だと思います.
今度は Unity Editor 側で Project Settings > Services > Vivox を開きます. Environment Configuration の Environment にて Automatic を選択すると, 上で設定された Credentials が設定されます.勿論 Custom の方を選択すればカスタム設定にすることもできます.
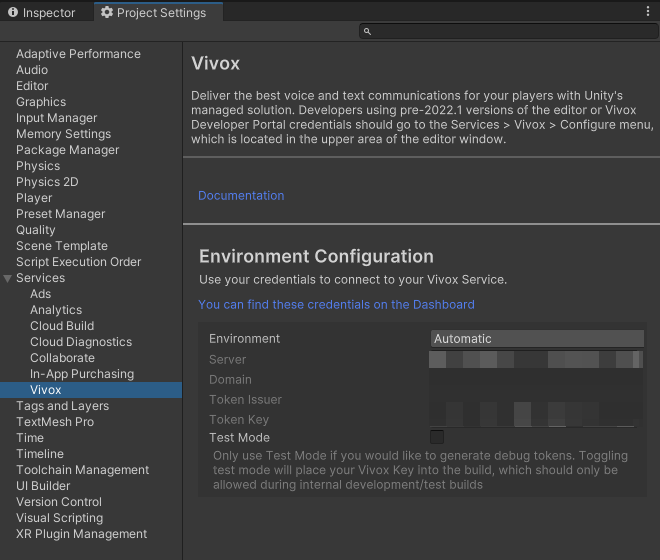
SDK Vivox 版の場合はここが ScriptableObject で設定を行う必要がありました. また,SDK Vivox 版にはない Test Mode の選択があります.これは開発環境に利用できそうです.
認証処理
いつものように Unity Gaming Services の初期化と Unity Authentication の匿名認証を利用します.
        await UnityServices.InitializeAsync();
        await AuthenticationService.Instance.SignInAnonymouslyAsync();
ちなみに注意ですが,Unity Vivox の Dependencies には Unity Authentication が今のところ入っていません. これは恐らく移行期ということもあって調整中なのかもしれません. なので別途 Unity Authentication をインストールする必要があります.
Chat Channel Sample では Unity Authentication の Package Importer エディタ拡張があり, まだインポート済ではない場合は自動的にインポートしてくれます.
using UnityEngine;
using UnityEditor;
using UnityEditor.PackageManager;

/// <summary>
/// Used to force add any package dependencies our ChatChannelSample requires.
/// </summary>
static class PackageImporter
{
    const string k_authPackageDependency = "com.unity.services.authentication@1.0.0-pre.6";

    /// <summary>
    /// Adds required packages to the project that are not defined/found during any domain reload.
    /// </summary>
    [InitializeOnLoadMethod]
    static void InitializeOnLoadMethod()
    {
#if !AUTH_PACKAGE_PRESENT
            ImportAuthenticationPackage();
#endif
    }

    /// <summary>
    /// Locates a specific version of the com.unity.services.authentication package and adds it to the project.
    /// </summary>
    static void ImportAuthenticationPackage()
    {
        Debug.Log($"[Vivox] Because the Chat Channel Sample requires {k_authPackageDependency}, it has been added to your project.");
        Client.Add(k_authPackageDependency);
    }
}
初期化処理
実は SDK Vivox 版の場合,初期化処理はちょっと手間があったのですが, UGS Vivox の場合はそこをうまい具合にラッピングしているようです.
VivoxService.Instance.Initialize();
これだけで初期化処理は完了します.SDK 版の方を先に触れているとちょっと驚きでした.
内部処理としては以下の感じです.JWT の作成を行ってますね.
        public void Initialize()
        {
            string uriString = Server;

            if (!IsEnvironmentCustom)
            {
                string environmentFragment = $"/{EnvironmentId}";
                uriString += environmentFragment;
            }

            Client = new Client(new Uri(uriString));
            Client.Initialize();
            if (IsAuthenticated)
            {
                Client.tokenGen = new VivoxJWTTokenGen();
            }
            else
            {
                Client.tokenGen.IssuerKey = Key;
            }
        }
セッション接続処理
    public void Login(string displayName = null)
    {
        // 自身のアカウント情報を作成
        m_Account = new Account(displayName);

        // セッション作成
        LoginSession = _client.GetLoginSession(m_Account);
        // 接続状態が更新された時のコールバック登録
        LoginSession.PropertyChanged += OnLoginSessionPropertyChanged;
        // セッション接続
        LoginSession.BeginLogin
        (
            LoginSession.GetLoginToken(),
            SubscriptionMode.Accept,
            null,
            null,
            null,
            ar =>
            {
                try
                {
                    LoginSession.EndLogin(ar);
                }
                catch (Exception e)
                {
                    LoginSession.PropertyChanged -= OnLoginSessionPropertyChanged;
                }
            }
        );
    }

    void OnLoginSessionPropertyChanged(object sender, PropertyChangedEventArgs propertyChangedEventArgs)
    {
        if (propertyChangedEventArgs.PropertyName != "State")
        {
            return;
        }
        var loginSession = (ILoginSession)sender;
        LoginState = loginSession.State;
        VivoxLog("Detecting login session change");
        switch (LoginState)
        {
            case LoginState.LoggingIn:
                {
                    VivoxLog("Logging in");
                    break;
                }
            case LoginState.LoggedIn:
                {
                    VivoxLog("Connected to voice server and logged in.");
                    OnUserLoggedInEvent?.Invoke();
                    break;
                }
            case LoginState.LoggingOut:
                {
                    VivoxLog("Logging out");
                    break;
                }
            case LoginState.LoggedOut:
                {
                    VivoxLog("Logged out");
                    LoginSession.PropertyChanged -= OnLoginSessionPropertyChanged;
                    break;
                }
            default:
                break;
        }
    }
LoginSession.BeginLogin でセッション接続を行うことができます.
BeginLogin に渡す情報は細かいところまではここでは割愛します.
サンプルではLogin とメソッド名になっていますが,個人的には Connect がしっくりします.
チャネル入室処理
接続完了状態になった後はチャネル入室を行います.
    public void JoinChannel(string channelName, ChannelType channelType, ChatCapability chatCapability, bool transmissionSwitch = true, Channel3DProperties properties = null)
    {
        if (LoginState == LoginState.LoggedIn)
        {
            // チャネル情報の生成
            var channel = new Channel(channelName, channelType, properties);
            // チャネルセッション生成
            var channelSession = LoginSession.GetChannelSession(channel);
            // 諸々コールバック登録
            // チャネル情報が変更された時
            channelSession.PropertyChanged += OnChannelPropertyChanged;
            // チャネルに人が増えた時
            channelSession.Participants.AfterKeyAdded += OnParticipantAdded;
            // チャネルに人が減った時
            channelSession.Participants.BeforeKeyRemoved += OnParticipantRemoved;
            // チャネルにいる人の状態(例えば発話状態とか)が更新された時
            channelSession.Participants.AfterValueUpdated += OnParticipantValueUpdated;
            // チャネル内でのメッセージログを受け取った時
            channelSession.MessageLog.AfterItemAdded += OnMessageLogRecieved;
            // チャネル入室処理
            channelSession.BeginConnect
            (
                // ボイスチャットの有効設定
                chatCapability != ChatCapability.TextOnly,
                // テキストチャットの有効設定
                chatCapability != ChatCapability.AudioOnly,
                transmissionSwitch,
                channelSession.GetConnectToken(),
                ar =>
                {
                    try
                    {
                        channelSession.EndConnect(ar);
                    }
                    catch (Exception e)
                    {
                        VivoxLogError($"Could not connect to voice channel: {e.Message}");
                    }
                });
        }
        else
        {
            VivoxLogError("Cannot join a channel when not logged in.");
        }
    }
入室に成功するとやっとボイスチャット・テキストチャットを利用することが出来るようになります.
ボイスチャット
ボイスチャットはマイクが有効になっている,かつ,チャネル入室時にボイスチャット可能な設定とされた上で, チャネル入室に成功した時,いつでもボイスチャットを利用することができます.
テキストチャット
テキストチャットは少し自分で処理を作らないといけません.
    /// <summary>
    /// テキスト送信処理
    /// </summary>
    /// <param name="messageToSend">送信するメッセージ</param>
    /// <param name="channel">チャネル情報</param>
    /// <exception cref="ArgumentException">ArgumentException</exception>
    public void SendTextMessage(string messageToSend, ChannelId channel)
    {
        // チャネルのバリデーションチェック
        if (ChannelId.IsNullOrEmpty(channel))
        {
            throw new ArgumentException("Must provide a valid ChannelId");
        }

        // 送信メッセージの空ヌルチェック
        if (string.IsNullOrEmpty(messageToSend))
        {
            throw new ArgumentException("Must provide a message to send");
        }

        // 送信先チャネルのセッション取得
        var channelSession = LoginSession.GetChannelSession(channel);

        // テキスト送信
        channelSession.BeginSendText
        (
            null,
            messageToSend,
            null,
            null,
            ar =>
            {
                try
                {
                    channelSession.EndSendText(ar);
                }
                catch (Exception e)
                {
                    VivoxLog($"SendTextMessage failed with exception {e.Message}");
                }
            }
        );
    }

    /// <summary>
    /// テキスト受信時のコールバック
    /// </summary>
    /// <param name="sender"></param>
    /// <param name="textMessage"></param>
    void OnMessageLogReceived(object sender, QueueItemAddedEventArgs<IChannelTextMessage> textMessage)
    {
        ValidateArgs(new [] { sender, textMessage });

        var channelTextMessage = textMessage.Value;
        VivoxLog(channelTextMessage.Message);
        OnTextMessageLogReceivedEvent?.Invoke(channelTextMessage.Sender.DisplayName, channelTextMessage);
    }
チャネル退室処理
チャネル退室は現在のチャネルセッションから接続を切断すればよいです.
channelSession.Disconnect();
サンプルでは参加しているチャネル全てから退室処理を行っています.
    public void DisconnectAllChannels()
    {
        if (ActiveChannels?.Count > 0)
        {
            foreach (var channelSession in ActiveChannels)
            {
                channelSession?.Disconnect();
            }
        }
    }
セッション切断処理
サンプルでは Logout になっています.
ログインセッションから接続を切断します.
    public void Logout()
    {
        if (LoginSession != null && LoginState != LoginState.LoggedOut && LoginState != LoginState.LoggingOut)
        {
            OnUserLoggedOutEvent?.Invoke();
            LoginSession.PropertyChanged -= OnLoginSessionPropertyChanged;
            LoginSession.Logout();
        }
    }
参考資料
Unity Vivox のドキュメントを閲覧するためにはアカウント登録が必要です.