Extenject
Extenject(旧 Zenject)はUnityで利用できる軽量で高パフォーマンスのDIフレームワークです. Asset Storeからインストールできます.
インストールするとサンプルプロジェクトが2種類あります.
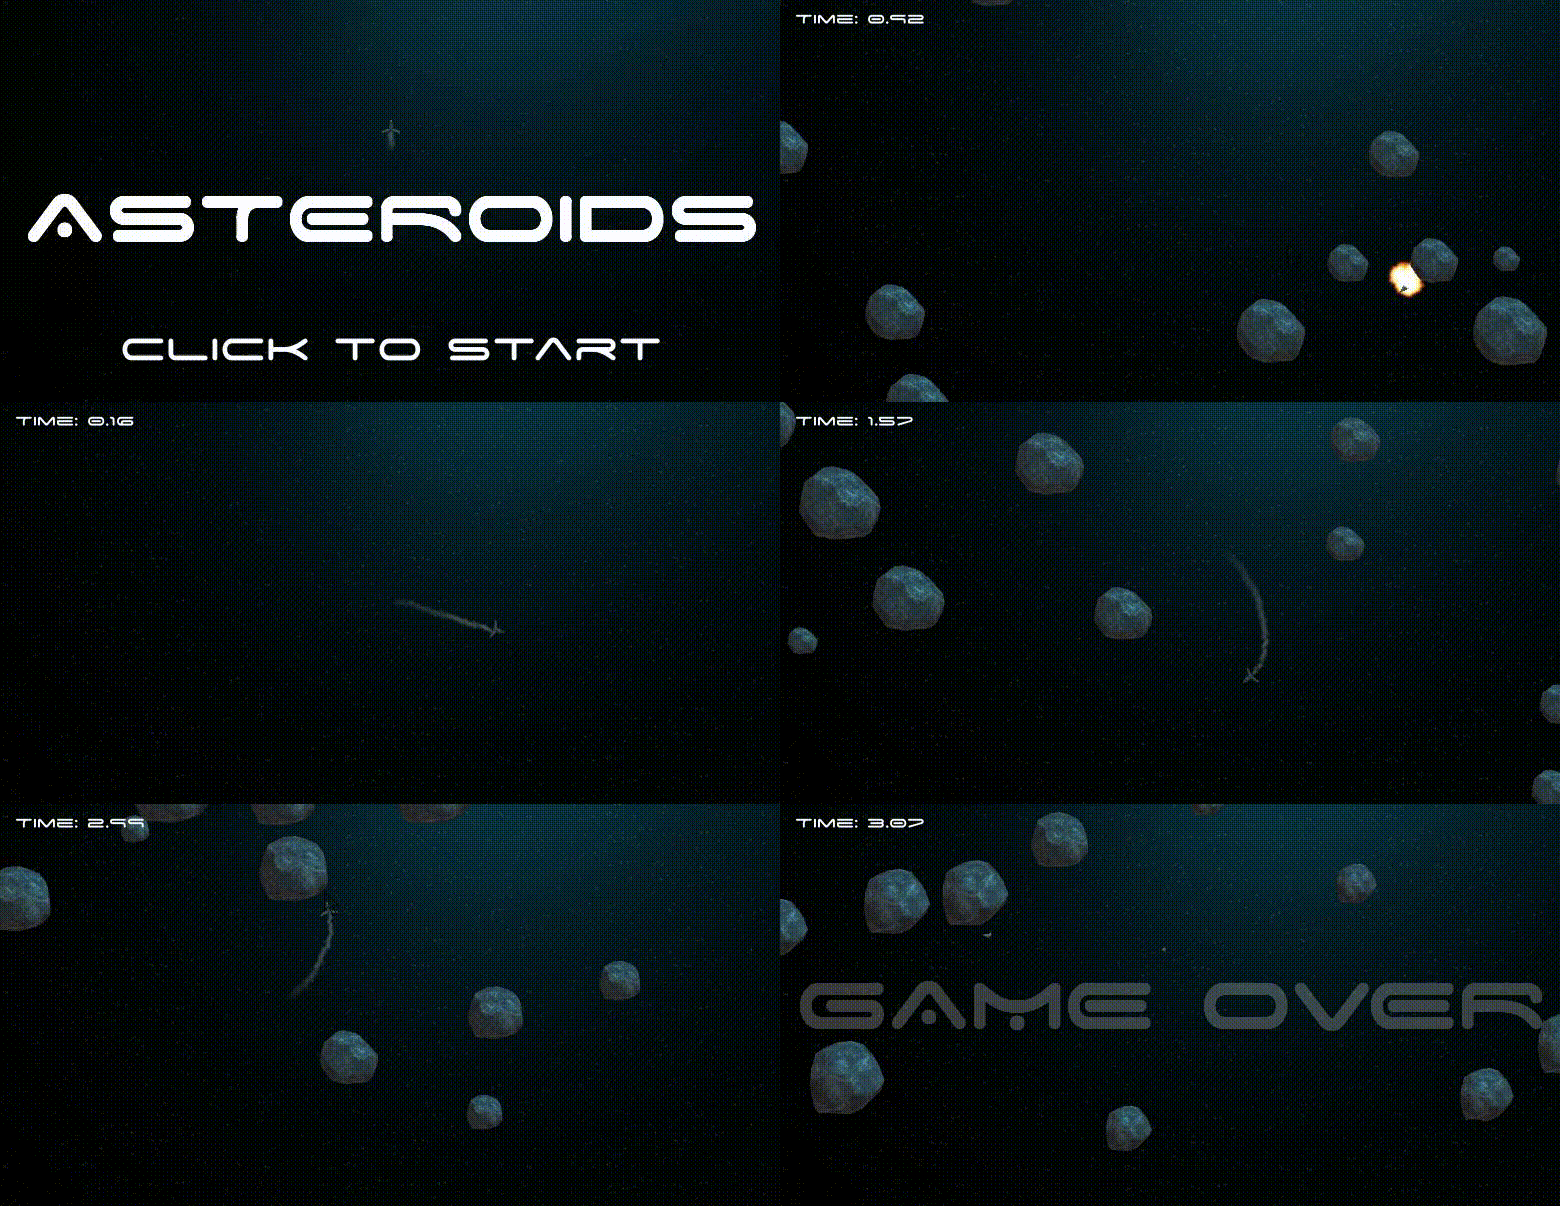
- SampleGame1 (Beginner)|Asteroids:隕石を避けるゲーム

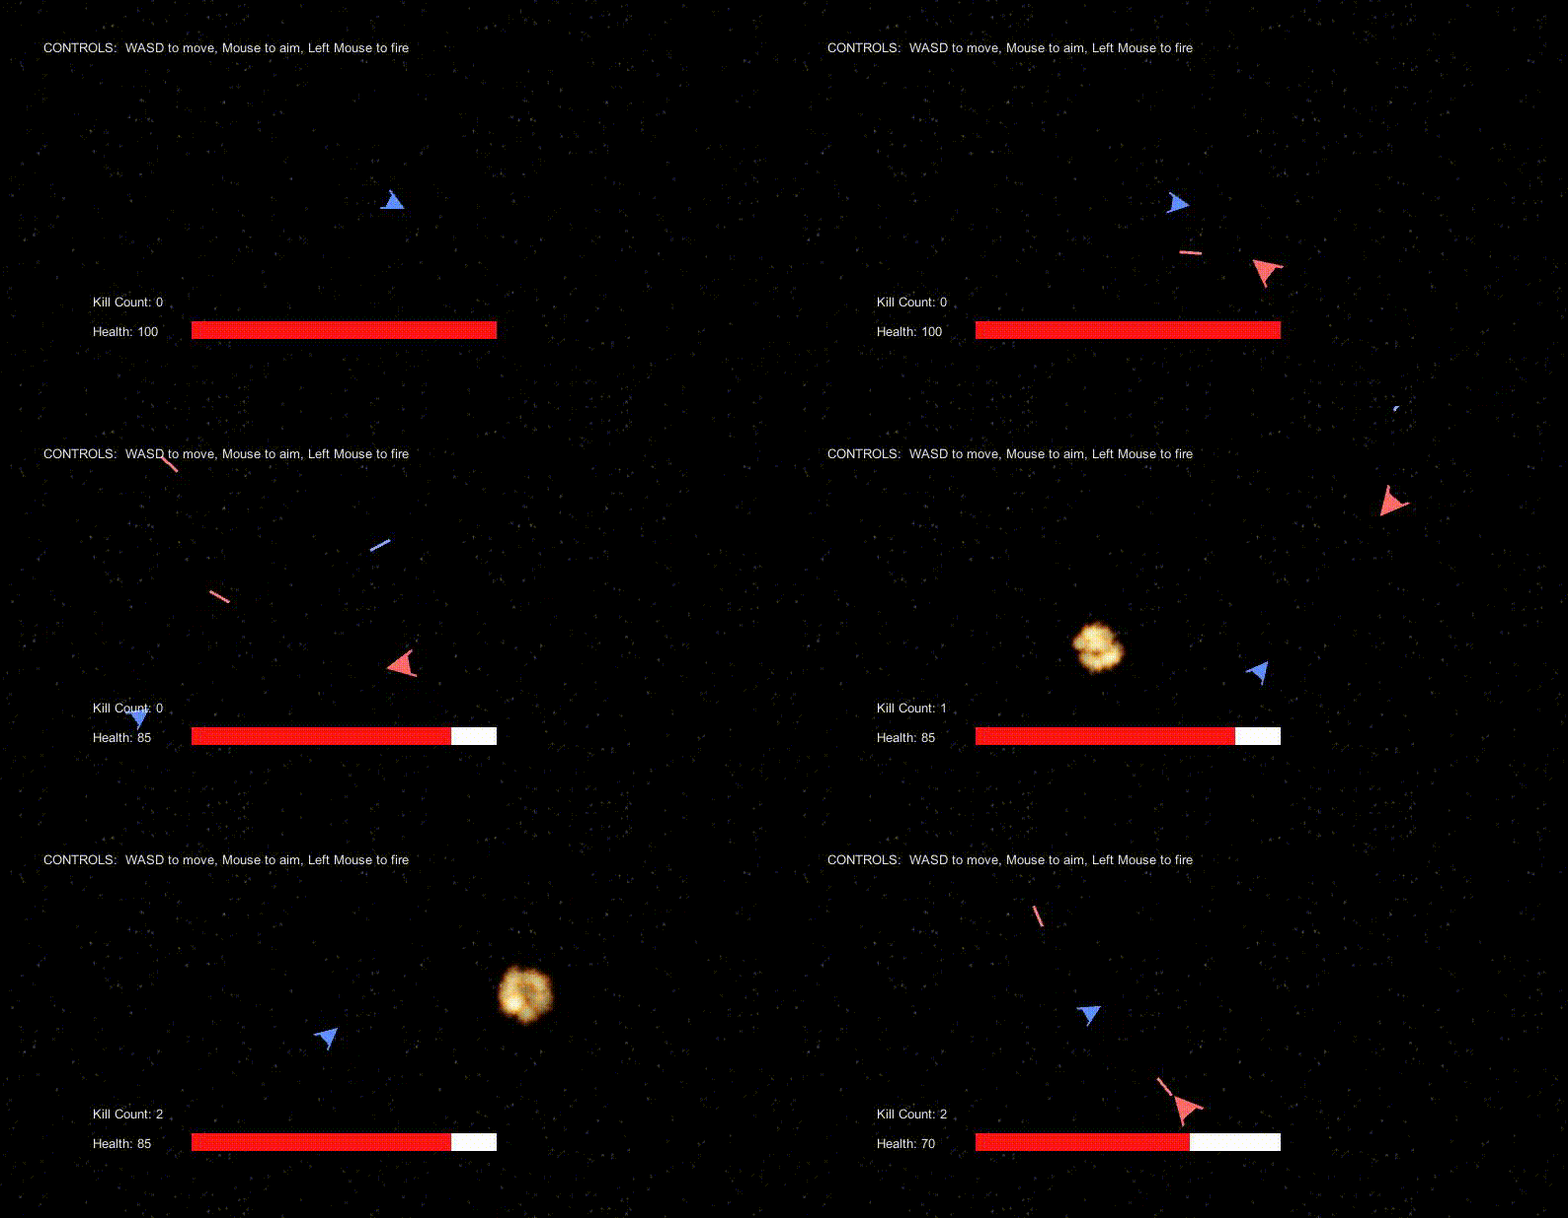
- SampleGame2 (Advanced)|SpaceFighter:敵飛行体の攻撃を避けながら攻撃するゲーム

ゲーム自体は単純なんですが,色々見てみると拡張性を考慮して出来ている…. このサンプルと以下の書籍を参考に勉強していきます.
スクリプトに書いてあるコメントもDeepLで翻訳しちゃう.
今回はシーンに置いてあるオブジェクトについて注目.
Asteroids の Hierarchy 構成
- SceneContext|Context
- Gui|GUI管理
- Scene|環境管理
- BackGround
- Camera
- Directional light
- Ship|自機
- Renderer
- Trail
それぞれのGameObjectを考察します.
SceneContext
SceneContextは,シーン内でのDIを担当するオブジェクト.

今回はScriptable Object InstallersにGameSettingInstallerが,
Mono InstallersにSceneContextにアタッチされているGameInstallerが登録されている.
Scriptable Object Installer
ScriptableObject化されたInstaller. 何らかのパラメタを保持し,複数パターン用意する場合に使う.
Zenject Binding と Installer
Zenject Binding: シーンに存在するMonoBehaviorに対してバインドするためのコンポーネントZenject Bindingコンポーネントをアタッチすることで, このオブジェクトはバインドされてますよ~というラベルみたいな意思が伝わる.Installer: MonoBehaviourを継承していないクラスだったり, 開始時にシーンに存在しないMonoBehaviourに対してバインドするためのコンポーネント 単なるInstaller,Mono Installer,Scriptable Object Installerがある.
using System;

namespace Zenject.Asteroids
{
    // ゲームの設定を含むインストーラには ScriptableObjectInstaller を使用します。
    // しかし、ここでMonoInstallerを使えない理由はありません。
    // ScriptableObjectInstaller を使用すると、ここでは設定に有利な点があります。
    //
    // 1) 実行時にこれらの値を変更して、プレイセッション間で変更を持続させることができます。
    //    MonoInstaller の場合は、ストップボタンを押すと変更が失われてしまいます。
    // 2) このインストーラの ScriptableObject インスタンスを複数作成してテストすることが簡単にできます。
    //    設定に異なるカスタマイズを加えることができます。 例えば、異なるインスタンスの
    //    ゲームの難易度モードごとに、"Easy "や "Hard "などのように設定します。
    // 3) 設定がゲームオブジェクトの構成ルートに関連付けられている場合は
    //    ScriptableObjectInstaller の方が簡単です。
    //    そうでなければ、実行時に各ゲームオブジェクト構成ルートの設定を個別に変更しなければなりません。
    //
    // 代替のゲーム設定を追加したい場合は、コメントを外してください。
    //[CreateAssetMenu(menuName = "Asteroids/Game Settings")]
    public class GameSettingsInstaller : ScriptableObjectInstaller<GameSettingsInstaller>
    {
        public ShipSettings Ship;
        public AsteroidSettings Asteroid;
        public AudioHandler.Settings AudioHandler;
        public GameInstaller.Settings GameInstaller;

        // ここではNested Classを使用して、関連する設定をまとめています。
        [Serializable]
        public class ShipSettings
        {
            public ShipStateMoving.Settings StateMoving;
            public ShipStateDead.Settings StateDead;
            public ShipStateWaitingToStart.Settings StateStarting;
        }

        [Serializable]
        public class AsteroidSettings
        {
            public AsteroidManager.Settings Spawner;
            public Asteroid.Settings General;
        }

        public override void InstallBindings()
        {
            Container.BindInstance(Ship.StateMoving);
            Container.BindInstance(Ship.StateDead);
            Container.BindInstance(Ship.StateStarting);
            Container.BindInstance(Asteroid.Spawner);
            Container.BindInstance(Asteroid.General);
            Container.BindInstance(AudioHandler);
            Container.BindInstance(GameInstaller);
        }
    }
}

Mono Installer
MonoBehaviourを継承しているシーンにアタッチできるInstaller. 基本的には各シーンに1つ以上のMonoInstallerを用意し, シーンに必要なオブジェクトのバインド処理を買いていくことになる.
using System;
using UnityEngine;

namespace Zenject.Asteroids
{
    public class GameInstaller : MonoInstaller
    {
        [Inject]
        Settings _settings = null;

        public override void InstallBindings()
        {
            // この例では、1 つのInstallerしかありませんが、
            // 大規模なプロジェクトでは、いくつかの異なるシーンで使いたい再利用可能な
            // インストーラーを多数用意することになるでしょう。

            // これにはいくつかの方法があります。
            // インストーラをプレハブ、スクリプト可能なオブジェクト、
            // シーン内のコンポーネントなどとして保存することができます.
            // あるいは、インストーラが MonoBehaviour である必要がない場合は、
            // 単に Container.Install を呼び出すことができます.

            // 詳しくはこちらをご覧ください。
            // https://github.com/modesttree/zenject#installers
            //
            //Container.Install<MyOtherInstaller>();

            // メインゲームのインストール
            InstallAsteroids();
            InstallShip();
            InstallMisc();
            InstallSignals();
            InstallExecutionOrder();
        }

        /***
        **
        ** 以下のBind方法に関する説明は次回以降の記事で細かく説明する
        **
        **
        ***/

        void InstallAsteroids()
        {
            // ITickable, IFixedTickable, IInitializable and IDisposable are special Zenject interfaces.
            // Binding a class to any of these interfaces creates an instance of the class at startup.
            // Binding to any of these interfaces is also necessary to have the method defined in that interface be
            // called on the implementing class as follows:
            // Binding to ITickable or IFixedTickable will result in Tick() or FixedTick() being called like Update() or FixedUpdate().
            // Binding to IInitializable means that Initialize() will be called on startup during Unity's Start event.
            // Binding to IDisposable means that Dispose() will be called when the app closes or the scene changes

            // Any time you use To<Foo>().AsSingle, what that means is that the DiContainer will only ever instantiate
            // one instance of the type given inside the To<> (in this example, Foo). So in this case, any classes that take ITickable,
            // IFixedTickable, or AsteroidManager as inputs will receive the same instance of AsteroidManager.
            // We create multiple bindings for ITickable, so any dependencies that reference this type must be lists of ITickable.
            Container.BindInterfacesAndSelfTo<AsteroidManager>().AsSingle();

            // Note that the above binding is equivalent to the following:
            //Container.Bind(typeof(ITickable), typeof(IFixedTickable), typeof(AsteroidManager)).To<AsteroidManager>.AsSingle();

            // Here, we're defining a generic factory to create asteroid objects using the given prefab
            // So any classes that want to create new asteroid objects can simply include an injected field
            // or constructor parameter of type Asteroid.Factory, then call Create() on that
            Container.BindFactory<Asteroid, Asteroid.Factory>()
                // This means that any time Asteroid.Factory.Create is called, it will instantiate
                // this prefab and then search it for the Asteroid component
                .FromComponentInNewPrefab(_settings.AsteroidPrefab)
                // We can also tell Zenject what to name the new gameobject here
                .WithGameObjectName("Asteroid")
                // GameObjectGroup's are just game objects used for organization
                // This is nice so that it doesn't clutter up our scene hierarchy
                .UnderTransformGroup("Asteroids");
        }

        void InstallMisc()
        {
            Container.BindInterfacesAndSelfTo<GameController>().AsSingle();
            Container.Bind<LevelHelper>().AsSingle();Collaborate from anywhere in VR, AR, Desktop &

            Container.BindInterfacesTo<AudioHandler>().AsSingle();

            // FromComponentInNewPrefab matches the first transform only just like GetComponentsInChildren
            // So can be useful in cases where we don't need a custom MonoBehaviour attached
            Container.BindFactory<Transform, ExplosionFactory>()
                .FromComponentInNewPrefab(_settings.ExplosionPrefab);

            Container.BindFactory<Transform, BrokenShipFactory>()
                .FromComponentInNewPrefab(_settings.BrokenShipPrefab);
        }

        void InstallSignals()
        {
            // Every scene that uses signals needs to install the built-in installer SignalBusInstaller
            // Or alternatively it can be installed at the project context level (see docs for details)
            SignalBusInstaller.Install(Container);

            // Signals can be useful for game-wide events that could have many interested parties
            Container.DeclareSignal<ShipCrashedSignal>();
        }

        void InstallShip()
        {
            Container.Bind<ShipStateFactory>().AsSingle();

            // Note that the ship itself is bound using a ZenjectBinding component (see Ship
            // game object in scene heirarchy)

            Container.BindFactory<ShipStateWaitingToStart, ShipStateWaitingToStart.Factory>().WhenInjectedInto<ShipStateFactory>();
            Container.BindFactory<ShipStateDead, ShipStateDead.Factory>().WhenInjectedInto<ShipStateFactory>();
            Container.BindFactory<ShipStateMoving, ShipStateMoving.Factory>().WhenInjectedInto<ShipStateFactory>();
        }

        void InstallExecutionOrder()
        {
            // In many cases you don't need to worry about execution order,
            // however sometimes it can be important
            // If for example we wanted to ensure that AsteroidManager.Initialize
            // always gets called before GameController.Initialize (and similarly for Tick)
            // Then we could do the following:
            Container.BindExecutionOrder<AsteroidManager>(-20);
            Container.BindExecutionOrder<GameController>(-10);

            // Note that they will be disposed of in the reverse order given here
        }

        [Serializable]
        public class Settings
        {
            public GameObject ExplosionPrefab;
            public GameObject BrokenShipPrefab;
            public GameObject AsteroidPrefab;
            public GameObject ShipPrefab;
        }
    }
}
色々なBind方法については後日書く…種類が多い….
Gui
Gui Handler と Zenject Binding がある.
Gui Handler
GUIに関する設定のハンドラ. ここからGUI設定を簡単に変更できるようになる.
Zenject Binding
シーンに存在するMonoBehaviorに対してバインドするためのコンポーネント
Zenject Bindingコンポーネントをアタッチすることで,
このオブジェクトはバインドされてますよ~というラベルみたいな意思が伝わる.(二度目の説明)

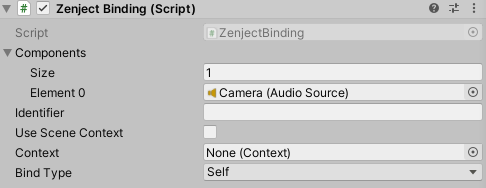
- Components:与コンポーネントをバインドする
- Identifier:(オプション) バインドする型に対して固有のIDを付けたい場合.区別がつくようになる.
- Use Scene Context:与コンポーネントをSceneContextにバインドするかどうか.
- Context:(オプション)未設定の場合,SceneContextが設定される.
- Bind Type:どのようにバインドするか設定する
- Self:
Container.Bind<Foo>().FromInstance(_foo);或いはContainer.BindInstance(_foo);を呼び出すことと同等 - All Interfaces:
Container.BindAllInterfaces(_foo.GetType()).FromInstance(_foo);と同等 - All Interfaces and Self:
Container.BindAllInterfacesAndSelf(_foo.GetType()).FromInstance(_foo);と同等 - Base Type:
Container.BindAllInterfacesAndSelf(_foo.GetType().BaseType()).FromInstance(_foo);と同等.
- Self:
Scene
背景,カメラ,ディレクショナルライトが設定されてる.
Background
特筆することなし.
Camera
Zenject Binding が2つついている. Zenject Binding コンポーネントが各々バインドしているコンポーネントの上に配置されている.わかりやすくするためかな?
1つめの Zenject Binding
Cameraコンポーネントがバインドされている.IdentifierとしてMainを登録.
Bind Typeは自分自身.

2つめの Zenject Binding
Audio Sourceコンポーネントがバインドされている. Bind Typeは自分自身.

Directional light
特筆なし.
Ship
自機のPrefab.
Zenject Binding がついており,Ship コンポーネントがバインドされている. Renderer と Trail については特筆なし.
